Showing posts with label before and after. Show all posts

8.16.2010

Guest Room: The Reveal


After ...
  • painting 2 dressers
  • making a new mirror and hanging another
  • installing trim for the chalkboard
  • mounting 2 besides lamps
  • adding a duvet and new blanket
  • painting the walls with Martha Stewart's Sharkey Gray

I have come up with this:


I love the crispness of the gray paint with the white curtains and trim. I have to say that the chalkboard is great, but I'm kind of scared to write on it, it is just so nice and clean! OCD I tell you. The pop of the yellow lights and the texture of the print on the duvet that I used for a bed skirt, it all just falls together nicely. I hope you like it too.

For fun lets look at the evolution...

{ 1 }

{ 2 }

{ 3 }


I think I'm done now. Guest Room we are no longer enemies.


8.10.2010

Guest Room Project#2- The Dressers


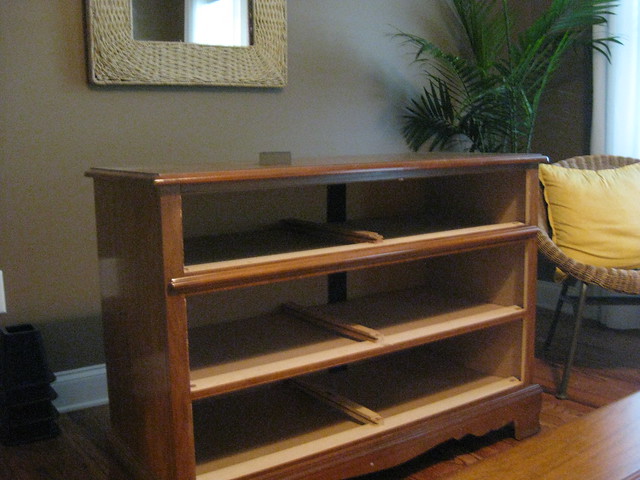
The jumping off point for this whole guest room re-do was my childhood dresser.


{The before}


It was mine when I was a baby- it converts to a changing table- and it followed me through college and into our first home, but it shows its age. Old hardware and a blah brown finish didn't help the aesthetics of the room. With my mother not too happy at first, I decided to repaint it and update the hardware.


{New Hardware too!}

The drawers got a few coats of white, and the body of the dresser a coat of Ralph Lauren's Modern Loft- a brilliant navy blue that we also used in our Master Bedroom. Since the paint was flowing the other dresser got a splash of navy too.


{Before}


I kept the original ceramic hardware that my Pap gave the dresser back in the day. Needless to say, I was soo happy that when I showed my mom the pictures of the newly finished dressers, and she loved them. I always tell Erik and my family that I know they think I'm crazy when I come up with these plans, but in the end everything works out. The dresser has a crisp, clean feel and with everything else that was done in the room it looks much more modern. I still have to share the rest of the room, so don't be shy...


{Sorry for the blurry pics, no flash and tired hands from all that painting!}


7.28.2009

All the Little Things


Here's a final look at the details of the freshened up guest room...


{ the BEFORE }


{ A fun print purchased from Etsy }


{ Mirror- Target, Lamp shade- Ikea }


{ Vintage camping prints from Old School Stationers via Etsy }


{ Light, rug, curtains- Ikea }

Everything has finally come together. The only little thing left is to repaint the dresser and update hardware, but it's not a have-to-do-at-this-minute type of thing. So I'm taking a break from redecorating. I can't wait for the next guest to come and enjoy the room!


7.21.2009

Guest Room Update


The Guest Room redo is still rolling but I wanted to give you another peak.


The To Do List still includes: refinishing the existing dressers, re-covering a lamp shade, and making some decorative pillows with punches of red for the bed. But it has come a long way from what it looked like when we first moved in:


The golden paint color was a leftover color from the previous house. I switched it for a warmer brown. The curtains were updated with higher hung Vivian curtains from Ikea. And the boring flush mount light was replaced with the more natural textured fixture, also from Ikea. I'll have more on the other details that were added including a How-To on the pillows I'm working on.

But what do you think of the changes so far?

7.16.2009

Hey Old Timer!


Photos are a must when decorating the home. I bet you can't stand in one single house without seeing a million picture frames full of memories. However it can get stale after a while. Lately turning pictures to black and white is the way to making them more interesting, or blowing them up large like I did with my wedding photos can help break the rut.


But Women's Health Magazine, yes a health magazine, gave a great way to amp up those pictures you have in ALL those frames: make 'em look old! All you have to do it visit this site (if it is in Japanese, click the English link in the top right corner to translate) and you can upload any of your pictures and it will convert them for you. A note: it works best with pictures that have medium tones- if you have a really sunny picture you'll want to up the contrast before or it will look very light and blown out. Here is an example of a picture I took of Erik when we went backpacking:


{ BEFORE }


{AFTER}


It definitely helps make your memories more unique and interesting. So load 'em up, convert 'em, and switch 'em out!

7.15.2009

Sneak Preview: Guest Room


{ The so drab BEFORE }

Busy (crazy) bee is at it again. As the school year approaches, I am in a scramble to get my To Do list for this summer complete. Next on the list was the guest room. When we moved in almost 3 years ago, it was one of the last rooms to get together. It has all hand-me-down furniture, a very bad, one coat of paint, and an ugly flush mount light fixture. So I decided that it needed an update. I gave myself strict guidelines:

1. No New Paint! I had to use left over paint from the many other paint projects. (Just like I did for the laundry room!)

2. Buy only the necessities. I purchased only artwork, curtains and a light fixture. Every else had to be repurposed from left overs from other re-dos.

3. I have to do it all by myself. If so, then husband doesn't get to gripe about another project (love you dear...).

Due to a little paint mishap that I'll elaborate on later, it is not 100% complete yet, but here is a little preview:


7.06.2009

Happy Dance!


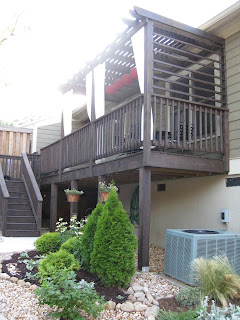
Here is our NEW and IMPROVED back porch with pergola in all its glory...


It has been a long labor of love that included 5 days of staining, 2 days of construction, 1 day of sewing and 1 day of landscaping. But it was all worth it when our 4th of July guests enjoyed the extra shade and comfy spot to eat and mingle.

I still would like to add some greenery on the porch and Erik hopes to get a couple benches made for extra seating. But all in all, it wasn't a difficult project, just a time consuming one. Remember what it looked like...

Before:


{ So hot and sunny...}


During:


All of it was necessary to achieve the amazing after:


Thank you to everyone who helped it all come together!!


I'll have an easy as pie tutorial to show you how I whipped up those awesome outdoor curtains so easily!