Showing posts with label home projects. Show all posts

8.16.2010

Guest Room: The Reveal


After ...
  • painting 2 dressers
  • making a new mirror and hanging another
  • installing trim for the chalkboard
  • mounting 2 besides lamps
  • adding a duvet and new blanket
  • painting the walls with Martha Stewart's Sharkey Gray

I have come up with this:


I love the crispness of the gray paint with the white curtains and trim. I have to say that the chalkboard is great, but I'm kind of scared to write on it, it is just so nice and clean! OCD I tell you. The pop of the yellow lights and the texture of the print on the duvet that I used for a bed skirt, it all just falls together nicely. I hope you like it too.

For fun lets look at the evolution...

{ 1 }

{ 2 }

{ 3 }


I think I'm done now. Guest Room we are no longer enemies.


8.10.2010

Guest Room Project#2- The Dressers


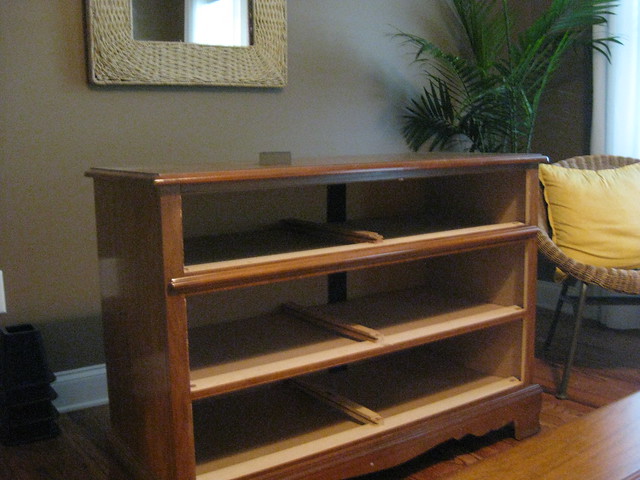
The jumping off point for this whole guest room re-do was my childhood dresser.


{The before}


It was mine when I was a baby- it converts to a changing table- and it followed me through college and into our first home, but it shows its age. Old hardware and a blah brown finish didn't help the aesthetics of the room. With my mother not too happy at first, I decided to repaint it and update the hardware.


{New Hardware too!}

The drawers got a few coats of white, and the body of the dresser a coat of Ralph Lauren's Modern Loft- a brilliant navy blue that we also used in our Master Bedroom. Since the paint was flowing the other dresser got a splash of navy too.


{Before}


I kept the original ceramic hardware that my Pap gave the dresser back in the day. Needless to say, I was soo happy that when I showed my mom the pictures of the newly finished dressers, and she loved them. I always tell Erik and my family that I know they think I'm crazy when I come up with these plans, but in the end everything works out. The dresser has a crisp, clean feel and with everything else that was done in the room it looks much more modern. I still have to share the rest of the room, so don't be shy...


{Sorry for the blurry pics, no flash and tired hands from all that painting!}


8.06.2010

Guest Room Redo, Project 1


I have always liked the symmetry of sunburst mirrors. What I don't like about them is the steep prices. Every one that I find and like is well out of my price range. { The one above is $200!!} So I was out in the interwebs, and I stumbled onto this blog tutorial that opened my world to having my own little sunburst.


{ It is identical!! }

I had a smaller, more simple version in my thoughts so I adapted the recipe a bit.


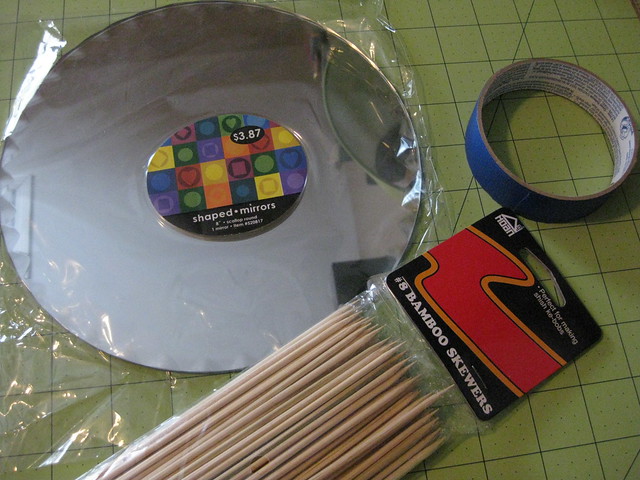
My materials were: a 7" diameter mirror, bamboo skewers, hot glue, gold spray paint and a finished roll of tape. Crazy list I know. I started with drawing two circles on the back of the mirror to use as guidelines. I then glued the skewers starting at 12, 3, 6, and 9, relative to a clock. And then just filled in the gaps between.


Obviously neatness isn't super important- hello wobbly circles! When I couldn't squeeze in anymore, I used the tape roll as a base to hang the mirror from. Once everything was secure out to the driveway I went to spray the skewers with a generous amount of gold spray paint. Here it is hanging at the top of the chalkboard headboard I painted:


Isn't it adorable! The total cost of my version was under $10 including the cost of the mirror, paint, and skewers. More details tomorrow on the dresser refinishing, and the reveal is soon to come. Have a great weekend!


7.26.2010

The Deck Monster


It all started last summer... we wanted a way to beat the heat and enjoy our back porch. We started with this:


Then did this:


I thought we were done here:


Again I made some changes and had this:


Most recently we added even more wood and stain to help camo the ugly underside of the deck monster.


The last thing we will do is add some lattice to the stairs to conceal the dirt and weeds under there too. I hate lattice, but it is cheap and I'm going to find a sun lovin vines to creep and crawl all over it! Plants make me happy...

Weren't here to get all the details during the big build? Go here to see it all go down!


5.25.2010

Craft Room Inspiration


Since I'm going to have some extra time on my hands ( summer vacation!!) I thought it was high time to get the Etsy shop updated and inventory up. However when I have to retire to our guest room to get to work I feel less than inspired. I like the guest room but I feel like it isn't my creative place. I have plans to try and add a nook to the office for my headband making and sewing. This serves as my main piece of inspiration at the moment:


I already have a Lack shelf in the office so I would be adding the display rod, another desk, and some cute containers to hold my notions. There is quite a list working of summer projects to keep me busy.


5.15.2010

Quiet Time, and a picnic


The days are flying by so fast that I just want any spare minute to sit. In quiet. With Erik, Doc or any other warm cuddly thing. But life prevails and continues.


One such instance is when our kitchen sink fell victim to a moment of frustration and ended up broken. To Home Depot we went. I figured if we were having to replace our builder boring faucet, we might as well get something that was nice and that we would want to have forever- or until another karate chop takes it down. We got this guy:


It has the removable spray nozzle and fun matching soap dispenser. It looked beautiful in the box, but what a pain to install for my very handsome and fit husband who had to squeeze under the sink to install it. After 2 hours and a trip to the hardware store, we had water use again and had to get out of the house.


We visited our favorite lunch spot and had a picnic with the little one. It was beautiful out. We laid on the blanket together in the warm sun, with whispers of "weiner dog!" as passerbys saw our adorable Doc hanging out with us.


{ side note: disregard the grass clippings, he likes to roll around on bugs }


A frustrating, rewarding, delicious, and relaxing afternoon.


10.05.2009

DIY: Chalkboard


.1.


.2.


.3.


.4.


.5.


.6.


.7.


.the end.


10.04.2009

Nighttiming


Here is our new chandelier in all its beauty in the dark:


Thanks again to my lovely husband for doing the heavy lifting, and my mother-in-law for the string lights that brought it to life.


9.11.2009

Our Close-Up @ YHL


Our retaining wall re-do is being featured on Young House love today!! If you want to relive all the dirty details go here! Thanks Sherry and John for the amazing support and inspiration!


7.28.2009

All the Little Things


Here's a final look at the details of the freshened up guest room...


{ the BEFORE }


{ A fun print purchased from Etsy }


{ Mirror- Target, Lamp shade- Ikea }


{ Vintage camping prints from Old School Stationers via Etsy }


{ Light, rug, curtains- Ikea }

Everything has finally come together. The only little thing left is to repaint the dresser and update hardware, but it's not a have-to-do-at-this-minute type of thing. So I'm taking a break from redecorating. I can't wait for the next guest to come and enjoy the room!


How-To: Applique Pillow


{ courtesy of designmilk.com }


The guest room bed needed something red. The red striped rug was lonely. I wanted to incorporate red on to the bed, so I decided that a pillow was in the cards. I have been looking on Etsy and at various other sights, but adorable pillows like the one above are very pricey. Cheap-sake on alert! Make it myself I say!

I had some leftover fabric from the outdoor curtains I did for the back porch, so I whipped up a pillowcase. Next I search the web for a bird silhouette. I found this lovely and printed it out.


Then I traced it onto a piece of stiff felt. I chose the stiffened felt because it is easier to cut crisp lines on. Cutting out the bird is next.


To secure the applique to the fabric I used some fusible webbing- a nifty material that uses heat to bond fabric together.


Now that the bird was secured to the fabric I stitched it on with white thread, tracing around the edges. I must say it wasn't the best job, but it was my first time, no too bad.


After I closed the pillowcase, the red bird was reunited with it's bed mates. The pillows behind are actually just pillow inserts from other pillows I had lying around. They had ugly covers so I just took them out and put them on the bed. They have a more natural feel.


The bed now has its red pop and the rest of the room has come together nicely. Head to the next post to see the details!